How to add onto TempID
Below is an example on how to add the terms of business onto TempID
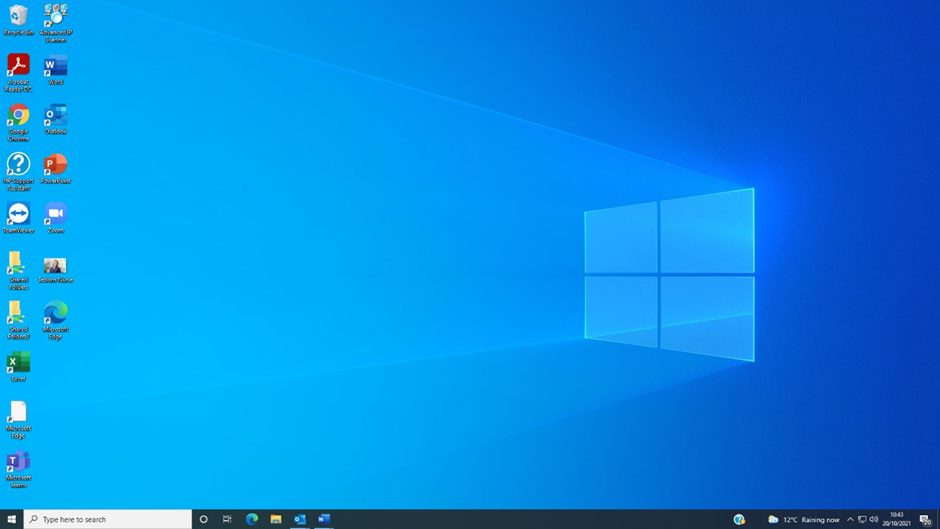
- Firstly, your home page should look similar to the image below:

- If you look, you have ‘Google Chrome’ or ‘Google’ as an icon. These are the largest search engines in the world, so make sure you click on them to take you through to their homepage.
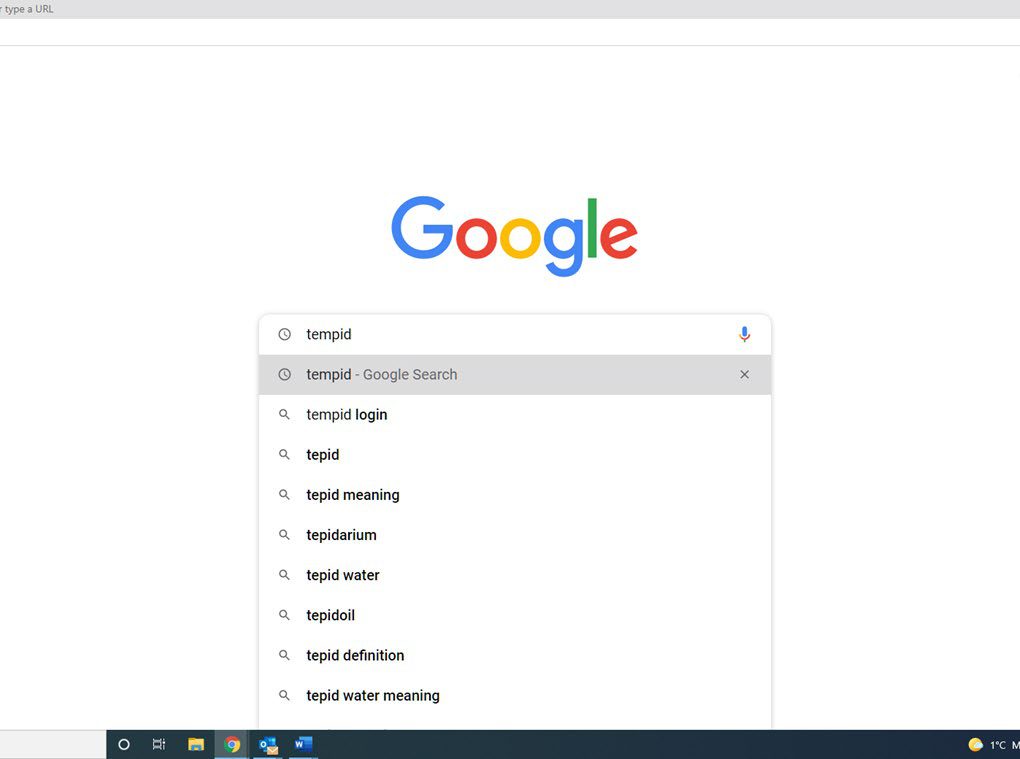
- You will then be directed to their homepage. Type in ‘TempID’ as shown below:
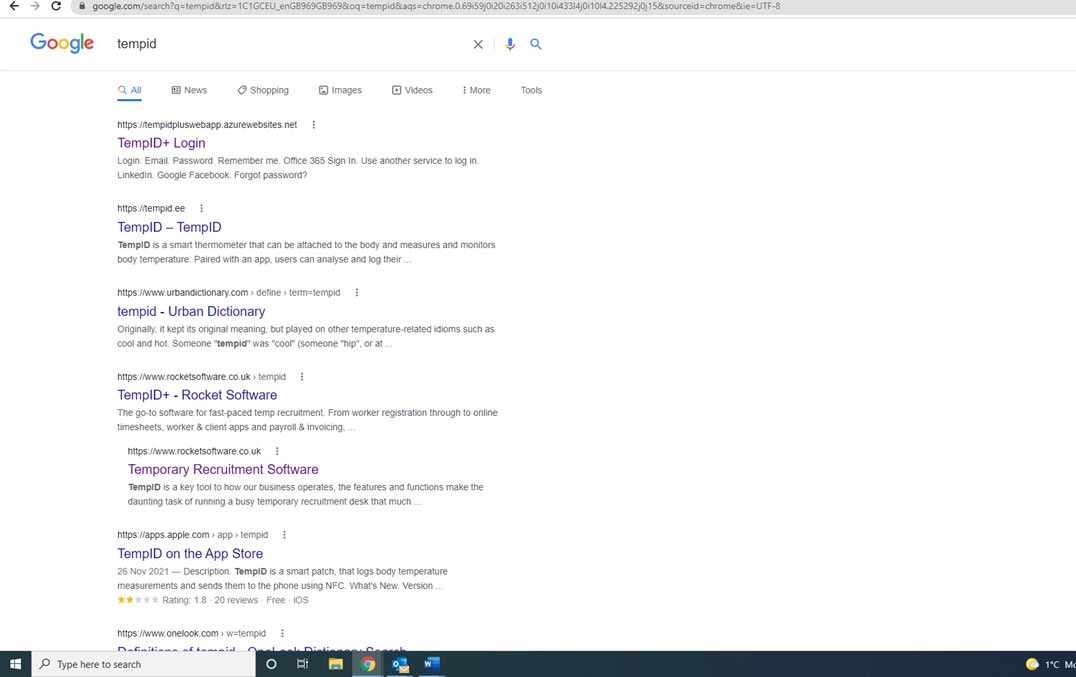
- You will then be directed to a list of results on google. Click on ‘TempID+ Login’ circled below.
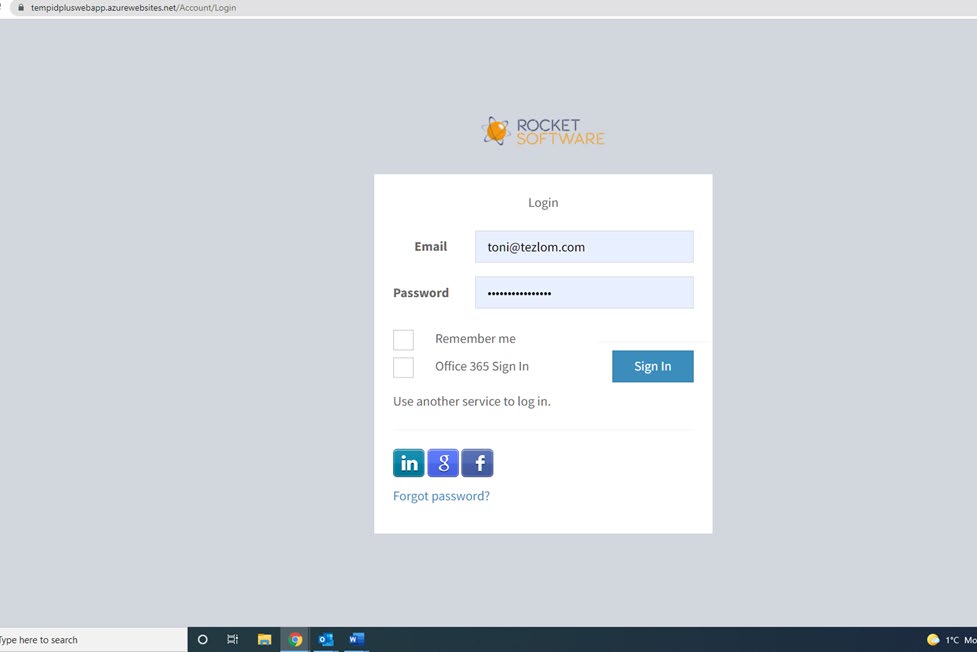
- You now need to log into TempID using your Tezlom email address and password as shown below:
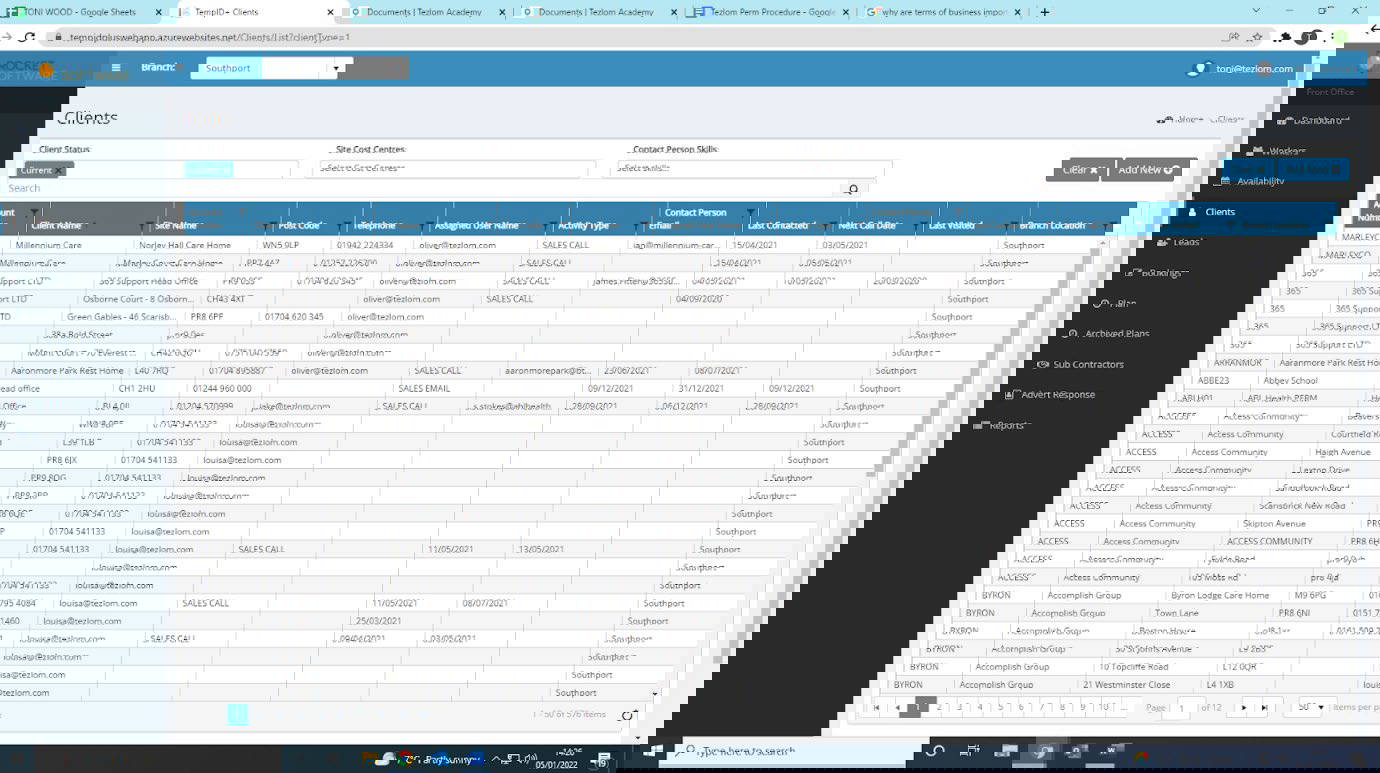
- Once you are logged into TempID, from the menu on the left, click on ‘Clients’

- You should be presented with the following page. In the search bar circled below, type your client’s name in here.
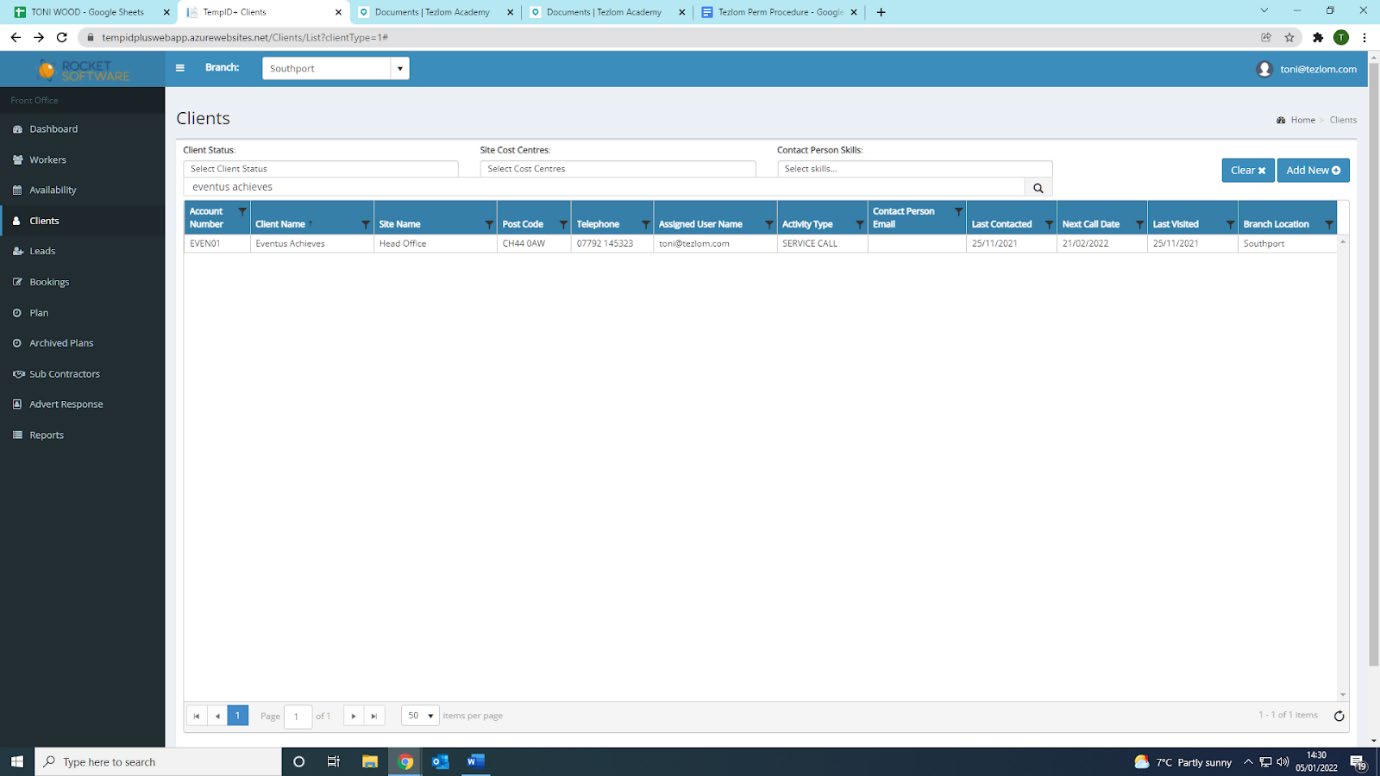
- Your page should now look something like the below. Click on the client name.
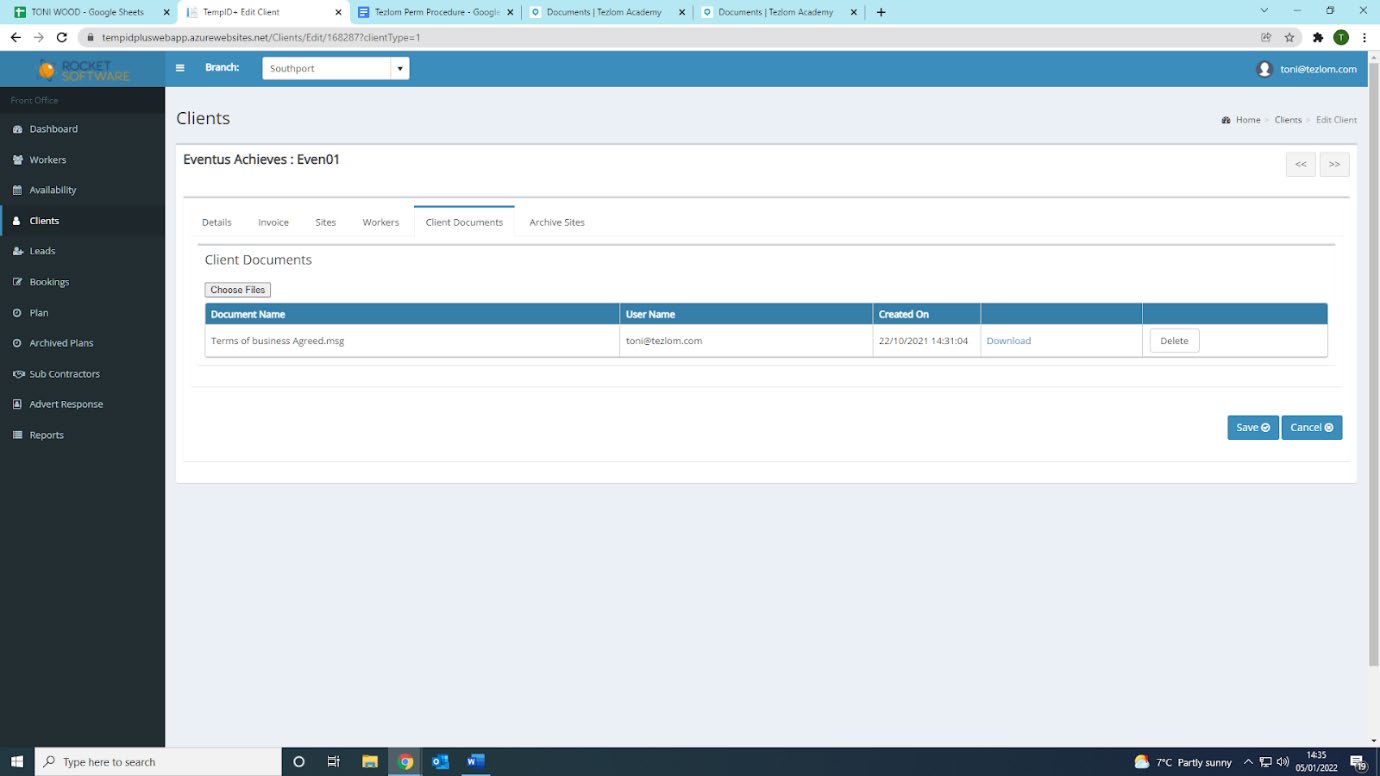
- You will be presented with the below page. Click on ‘Client Documents’ circled below.

- The following page will be presented. Click on ‘Choose Files’ as circled below.
- The below should pop up once you have clicked on ‘Choose Files’. The way you lay out your computer and documents may be different, however in this example, I have saved all terms of business within a separate folder, as shown below:
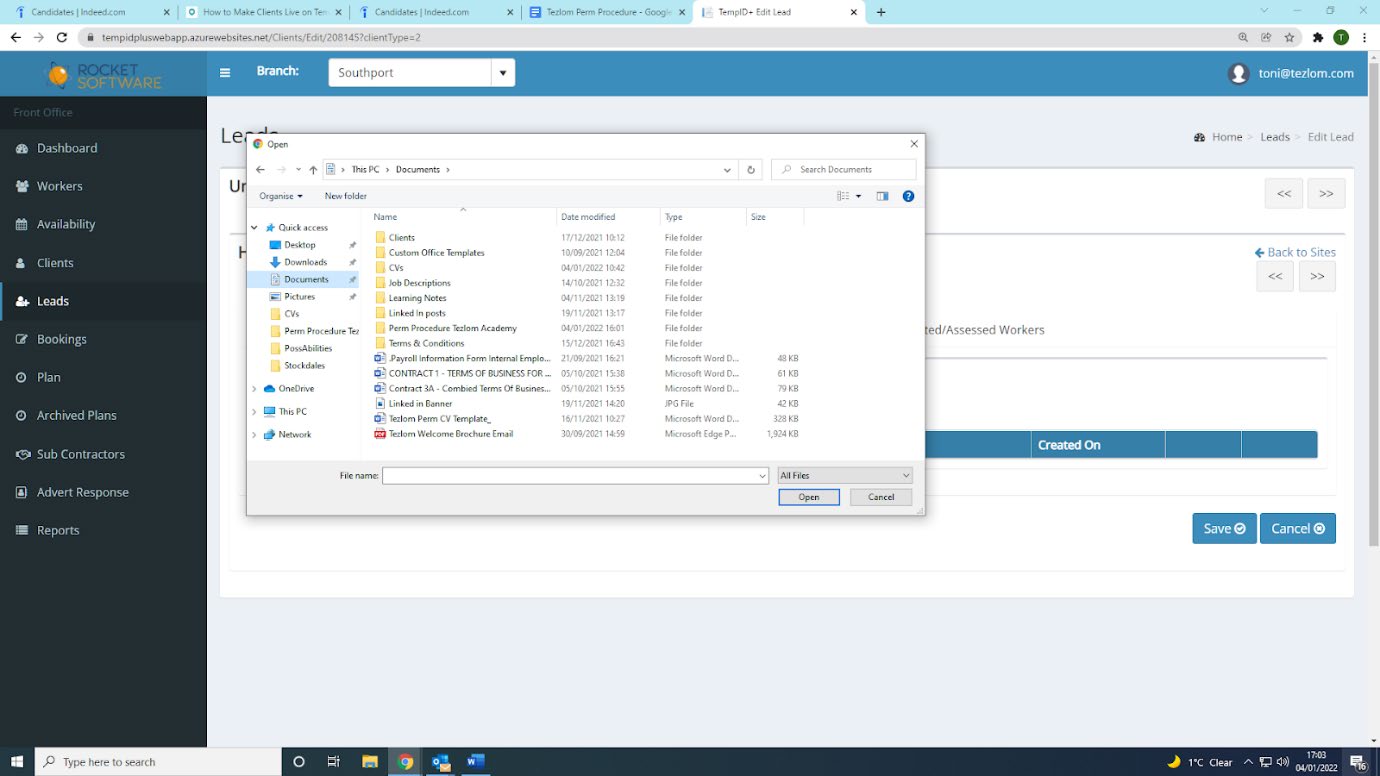
- Click on the terms of business and any other relevant documents for the client, and click ‘Open’.
- Once you have opened all of the relevant documents, click save
You have now successfully uploaded the Terms of Business onto TempID.